Enable Inbound Call Recording
Enable Inbound Call Recording
Disclaimer
Most countries and states have strict laws on call recording and we advise you to seek legal advice before enabling or recording any telephone conversation. By enabling call recording you are agreeing to indemnify URL Networks, affiliates, subsidiaries and suppliers to any costs or legal implications.
Inbound call recording is enabled via a dialplan condition. The following steps describe the process:
- Login to our Dashboard
- Manage your Hosted PBX service, by clicking the wrench icon
- Select Call Routing then Dialplans
- From the dropdown box labelled Select Dialplan to Manage select the Dialplan you wish to enable call recording on, usually this is the Dialplan at the start of your call flow
- Next edit the condition you want the Call Recording to be started on
- From the list of Available Actions click the + sign on the Call Recording action
- Review the disclaimer and if you accept click Yes, I Agree
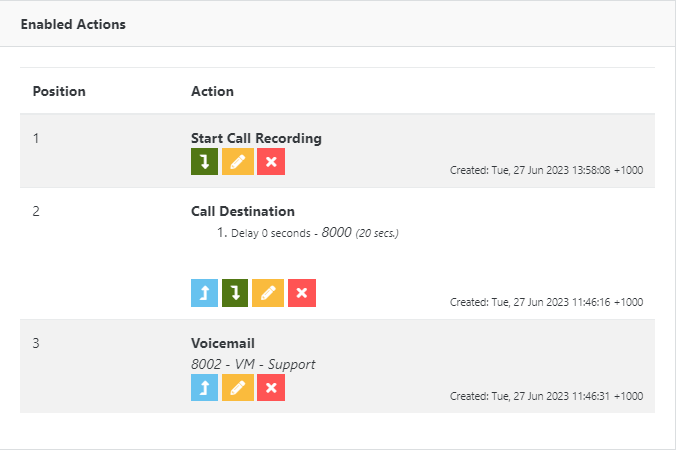
- If this is an existing Dialplan you may need to move the recently added Call Recording action to the top of the list, you do this by pushing the up Arrow
- From the list of Available Actions click the + sign on the Audio Announcement action, then either upload a new file or select a default one from the list. Please note, this step is only required if you want to have an automatic announcement played to callers informing them the call will be recorded.
- If this is an existing Dialplan you may need to move the recently added Audio Announcement to the top of the list just below the Call Recording action, you do this by pushing the up Arrow
Your condition should look something like this:


