FreePBX (Asterisk 12 and above PJSIP)
FreePBX (Asterisk 12 and above PJSIP)
If you are running a later version of FreePBX that includes Asterisk 12 and above with PJSIP you should follow this method.
If you get stuck and need assistance please contact our support department.
- Login to your FreePBX control panel via the IP Address for your server, for example if you server uses the IP 192.168.1.50 enter http://192.168.1.50 in your web browser
- Select Connectivity then Trunks
- Select Add Trunk then select Add SIP (chan_pjsip) Trunk
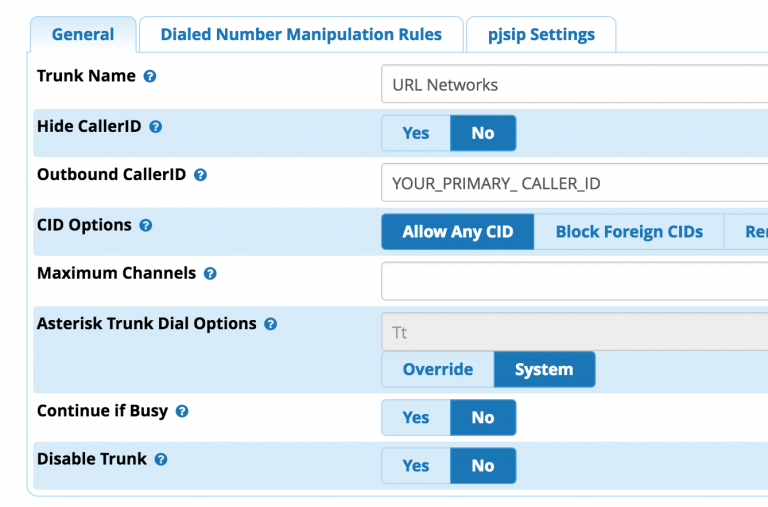
- On the next screen enter the following:
- Trunk Name: URL Networks
- Outbound Caller ID: Set this to be your primary phone number (include the full country + area code. e.g. 61312341234)

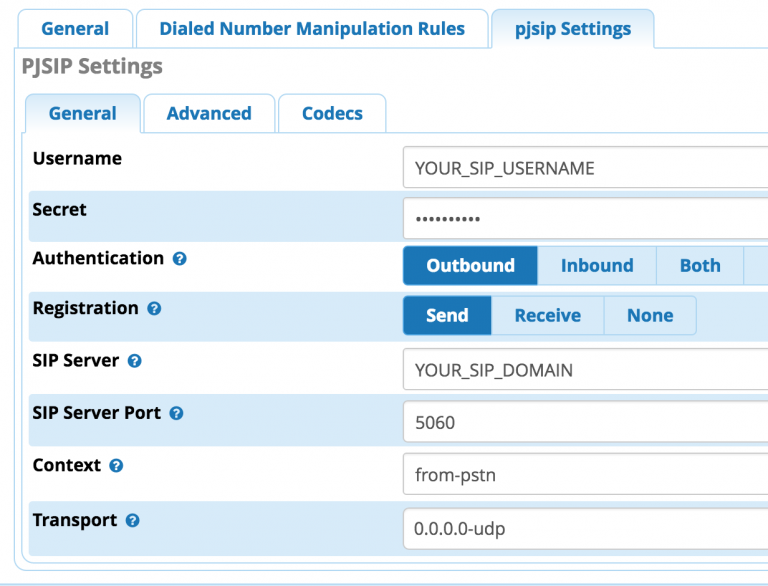
- Next select pjsip Settings and enter the following
- Username: Your SIP username, this will be in your account notification email or you can view it via our Dashboard.
- Password: The SIP password for the account, this will be in your account notification email or you can view it via our Dashboard.
- Authentication: Outbound
- Registration: Send
- SIP Server: Your SIP server address, this will be in your account notification email or you can view it via our Dashboard.

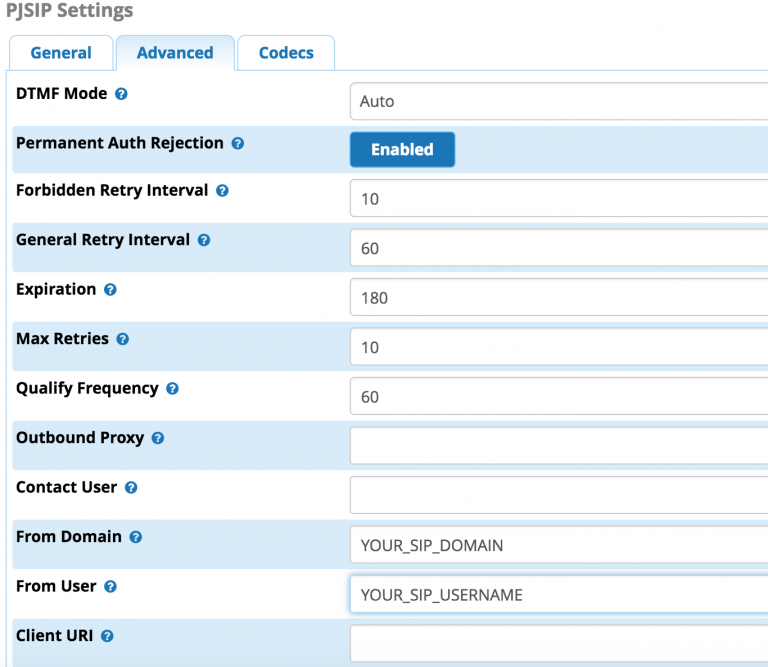
Select the Advanced tab and enter the following:
- From Domain: The SIP Server used in the previous section
- From Username: Your SIP Server Username


