Source: Netcomm NF18Mesh User Guide PDF
Interfaces
Front View

Power
![]()
Red = The NF18Mesh is powered on and initialising.
Green = The NF18Mesh is powered on and operating normally.
Off = The power is off.
Internet
![]()
Green = The NF18Mesh is connected to an Internet service.
Green Blinking = Data is being transmitted to or from the Internet.
Off = The NF18Mesh is not connected to the Internet.
WAN
![]()
Green = A device is connected to the Ethernet WAN port.
Green Blinking = Data is being transmitted to or from the WAN.
Off = No device is connected to the Ethernet WAN port.
DSL
![]()
Off = No DSL signal detected.
Green Blinking = Syncing (signal is detected)
Green = DSL synchronised
Rear View

- DSL – used for VDSL (xDSL) and required an RJ11 phone cable to connect to your wall jack.
- Telephone 1 and 2 – connect to an analogue phone handset for use with a VoIP service.
- Ethernet 1-4 – Gigabit LAN ports.
- WAN – Gigabit-capable WAN port to be connected to an NTD (or ONT) for high-speed Internet access.
- RESET button – hold for 10 seconds to factory reset the router.
- 2.4G WPS and 5G WPS buttons
- USB1
- POWER supply jack – connect the provided power supply cable here.
- Rear product label
Installation and Configuration
If you have purchased a Netcomm NF18Mesh from URL Networks there is no need to worry about configuration as your new router will be ready for use out of the box.
If you have factory reset the router or purchased elsewhere please follow the instructions below.
- Connect your device to your router with an ethernet network cable or WiFi.
- If your connection type is FTTN, FTTB, VDSL or xDSL, connect an RJ11 phone cable between the DSL port on the NF18Mesh and your phone line wall outlet.
- For other connection types, connect an ethernet networking cable (CAT5 or CAT6) between the WAN port on the NF18Mesh and your NTD/ONT.
- Open your internet web browser and go to http://192.168.20.1 or http://cloudmesh.net
- At the login prompt enter the username and password details listed on the back of your router (see below Rear View > 9. Rear product label).
If you have not yet set up your device the following screen will appear:
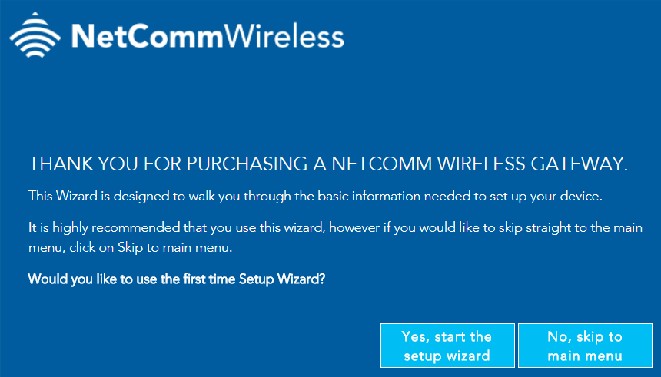
The Wizard will guide you through a step-by-step process to set up your device. We recommend that you use this wizard as it covers all the basic settings.
Click the Yes, start the setup wizard button to select this option.
INTERNET Settings
The INTERNET settings prompt you to select the WAN connection type that you will be using and to enter all the parameters required to enable the service. First select your INTERNET SERVICE: ADSL, VDSL or Ethernet WAN
If your connection type is FTTN, FTTB, VDSL or xDSL, select VDSL.
For other connection types select Ethernet WAN.
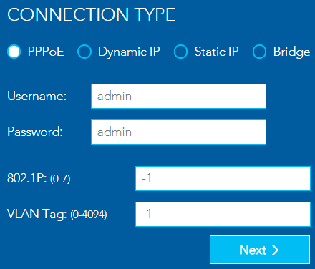
VDSL
Select Connection Type: PPPoE
These details were provided in the email we sent when your service was activated.
Reach out to our support team if you don’t have these.
Enter your Username (usually 12345@internet.url.net.au, 12345@lightningbroadband.com.au or similar).
Enter your Password
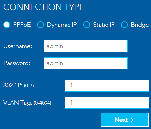
Ethernet WAN
For Opticomm connections select Connection Type: Dynamic IP
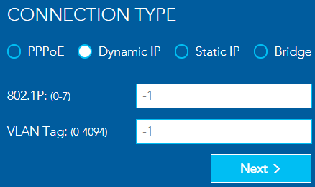
For other networks select Connection Type: PPPoE
These details were provided in the email we sent when your service was activated.
Reach out to our support team if you don’t have these.
Enter your Username (usually 12345@internet.url.net.au, 12345@lightningbroadband.com.au or similar).
Enter your Password
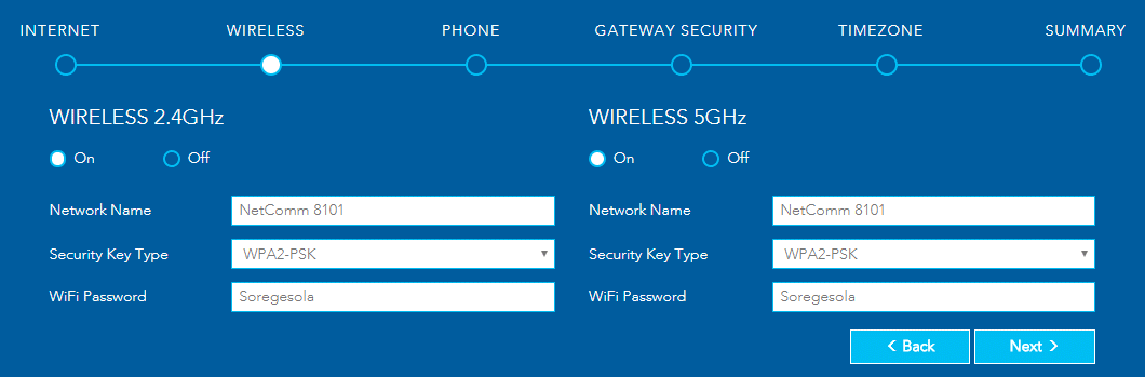
WIRELESS Settings
We recommend leaving the default settings.
You can change these to suit your preference.
PHONE Settings
Skip this by clicking Next unless you have a VoIP service that you want to configure.
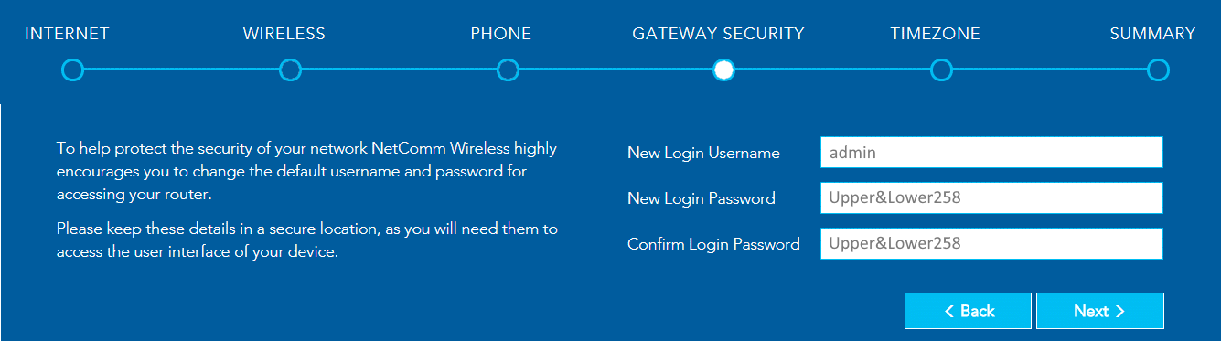
GATEWAY SECURITY Settings
We recommend leaving the default settings.
You can change these to suit your preference.
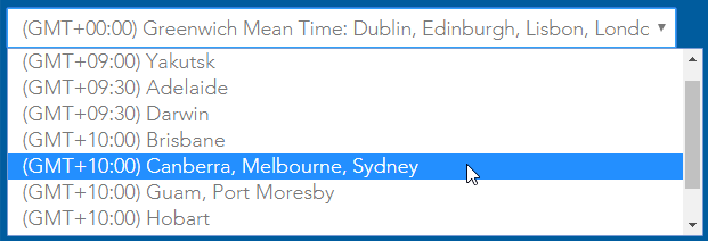
TIMEZONE Settings
Select your time zone.
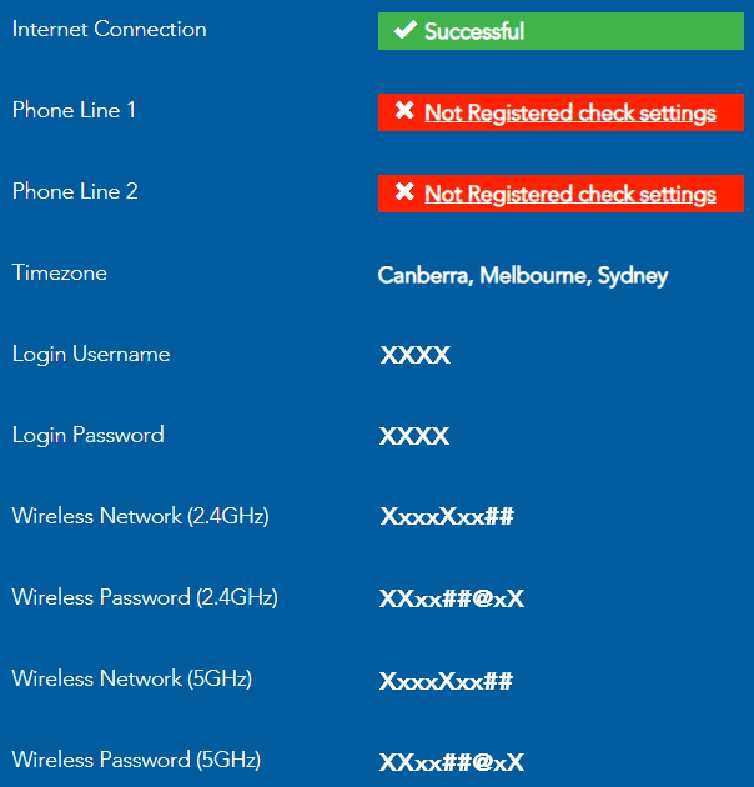
SUMMARY
Allow the gateway sufficient time (three to four minutes) to establish its connections.
The following status indicators will be populated.
Internet Connection Indicates the status of your chosen Internet Connection. If not Successful, click on the red or yellow message area to jump back to the INTERNET section of the Wizard to make the appropriate changes.
Phone Line 1 & 2 Indicates the status of either of your optional VoIP Phone Line connections. If not Successful and you were expecting VoIP service, click on the red or yellow message area to jump back to the PHONE section of the Wizard. You may need to contact your VoIP service provider or ISP for additional setup instructions.
Timezone Indicates the timezone you selected at the TIMEZONE stage of this Wizard. Click the < Back button twice if you want to change it.
Login Username The Username used or set to be used to access the gateway.
Login Password The Password used or set to be used to access the gateway.
Wireless Network (2.4 GHz) The name of the 2.4GHz network, either assigned by your ISP or created by you at the WIRELESS stage of this Wizard. This will appear in the list of wireless networks that appears when your wireless device scans for available networks. Click the < Back button four times if you want to change it or enable the 2.4GHz network.
Wireless Password (2.4 GHz) The Password is either assigned by your ISP or created by you at the WIRELESS stage of this Wizard to access the 2.4GHZ network. Click the < Back button four times if you want to change it or enable the 2.4GHz network.
Wireless Network (5 GHz) The same functionality for 5GHZ wireless networks as for 2.4GHz networks described above.
Wireless Password (5 GHz) The same functionality for 5GHZ wireless networks as for 2.4GHz networks described above.
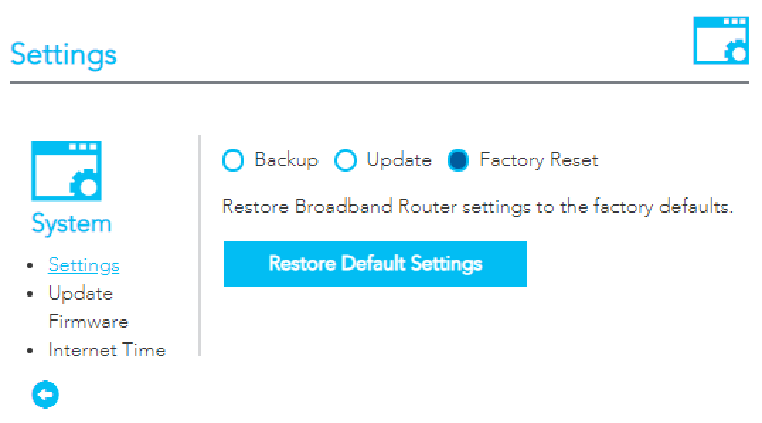
Restore Factory Default settings
To permanently erase all custom user settings and return to the factory default settings, click the Advanced menu button and select Configurations from the System group.
The Settings page will open.
Select Factory Reset and then click the Restore Default Settings button.
A confirmation message will display. Click OK to continue and the NF18MESH will shut down and reboot using the factory default settings.
Close the web user interface and wait for 2 minutes before reopening your web browser.
When you next log in using the default Username and Password you will be prompted to run the first-time Setup Wizard.
Main Summary Screen
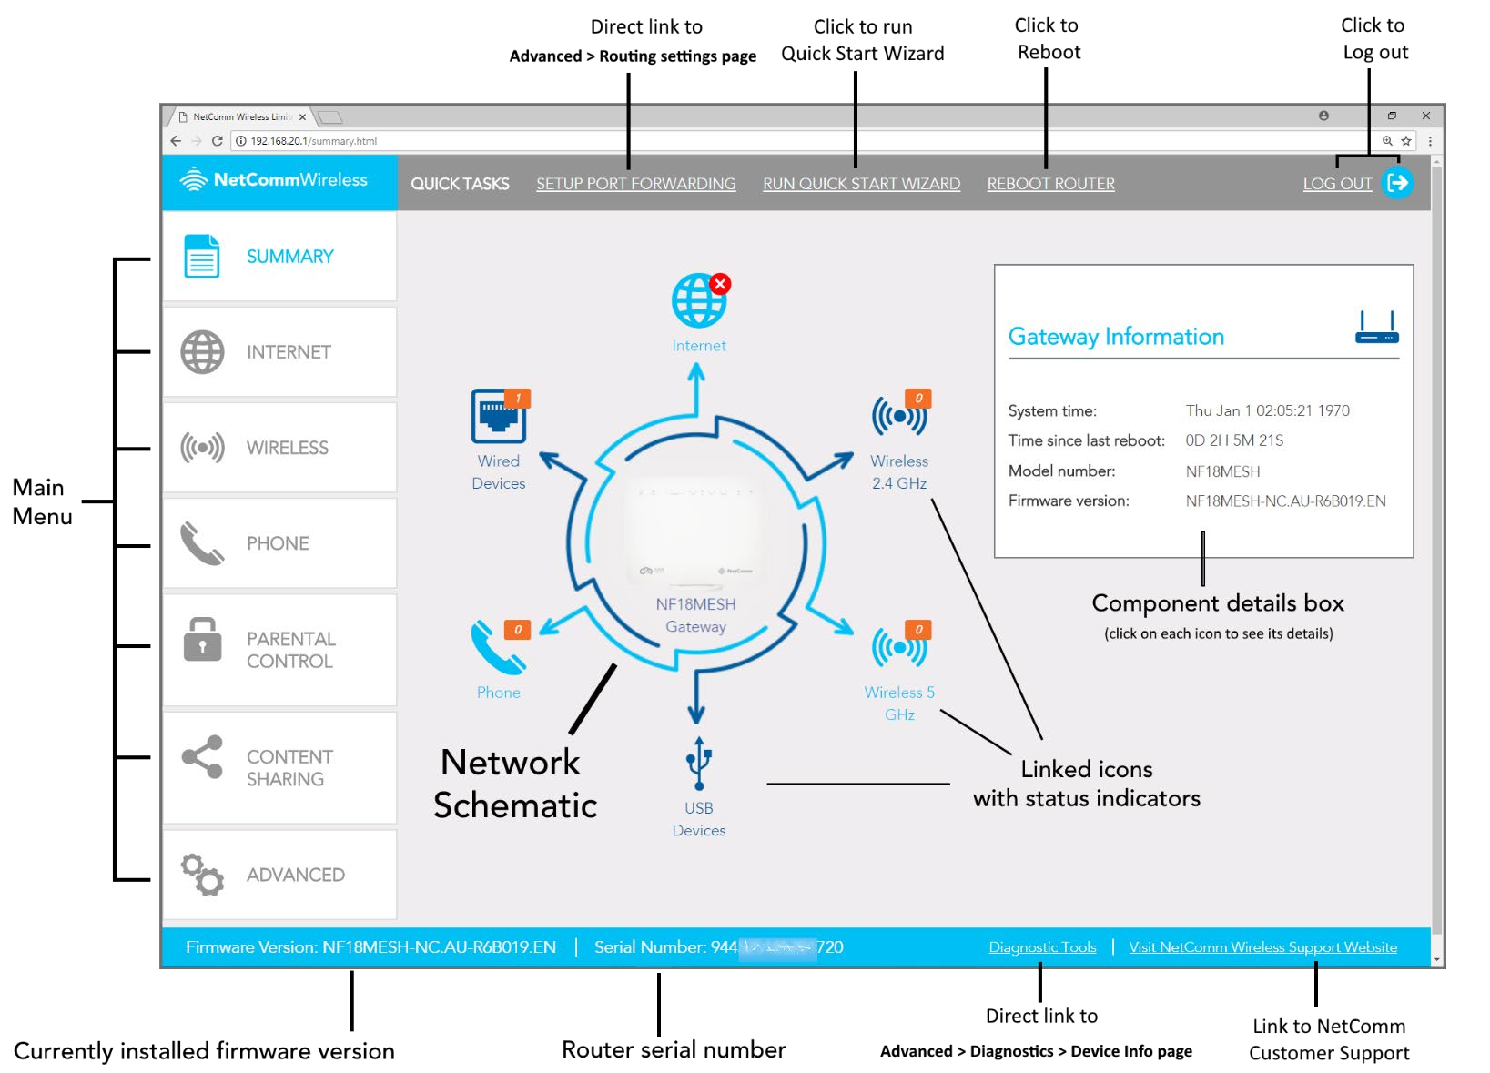
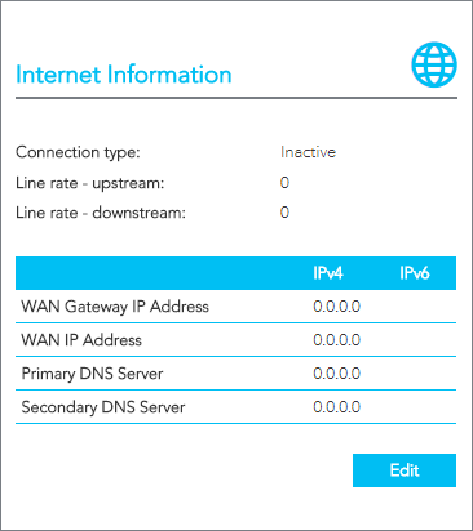
Internet Information
Connection type The current connection type or status of your connection. The possible Connection types that can be displayed are:
- ETH – Ethernet WAN connection
- PTM – VDSL connection
- ATM – ADSL connection, or
- No Connection – no WAN interface set up or no connection to the Internet.
Line rate – upstream The current speed of data being uploaded from the NF18MESH.
Line rate – downstream The current speed of data being downloaded into the NF18MESH.
IP Addresses for IPv4 and IPv6
WAN Gateway IP Address IP address of the WAN Gateway
WAN IP Address IP address of the WAN
Primary DNS Server IP address of the Primary DNS Server
Secondary DNS Server IP address of the Secondary DNS Server
Internet
Click on the INTERNET button to display details of all Current Connections to the internet.
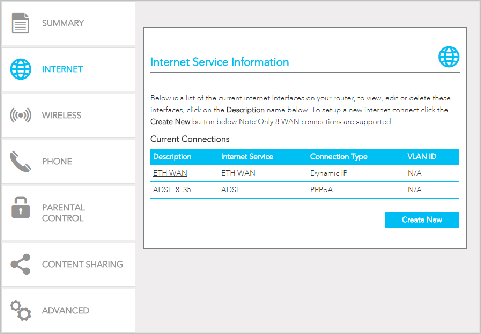
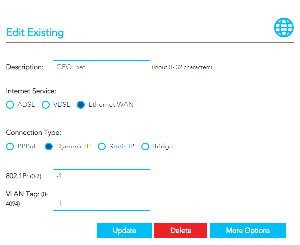
Edit a service
Click on the linked Description name to open the Edit Existing settings dialog.
Up to eight WAN connections at a time can be deployed.