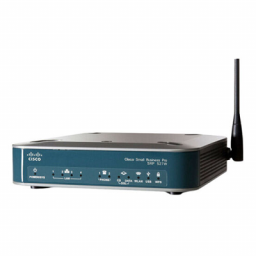
Cisco SPA3102 – PSTN Gateway
Cisco SPA3102 – PSTN Gateway
The instructions on this page will guide you though how to configure your SPA3102 device to forward calls from your PSTN line to your HostedPBX service.
To follow this guide you will need:
- HostedPBX Extension to the PSTN gateway.
- The Number you wish to divert the calls to.
Hardware Connections
The SPA3102 device is also a router and if you have not already connected it to your network you will need to complete this step.
- Connect your computer via Direct cable connection from the ethernet port on your computer to the ethernet port on the SPA3102
- Connect a cable from your broadband router to the SPA3102 Internet port
Accessing the Administration
- If you are connected to the ethernet port of the device you should be able to browse tohttp://192.168.0.1
- If successful you should see a page similar to:
- Now click the link “Admin Login”, if this is a default configuration you will not have to enter a password
- Once logged in click “Advanced”
Administration Password
For additional security it is always recommended you set an admin password on your device. Please follow these steps to set an administration password:
- Click the “System” tab
- In the Admin Passwd field enter a secure password. As guide you should always use capital letters and numbers and not form a dictionary word.
- Once you have enter a password click “Submit All Changes” to apply
- Now when you access the administration page you will need to login using the username admin and the password you just entered.
Step 1 – SIP
From the menu ensure you have selected “Voice” and click the “SIP” tab. Then make sure the following settings are set:
- RTP Packet Size – 0.020
- G729a Codec Name – G729
Step 2 – Regional
From the menu ensure you have selected “Voice” and click the “Regional” tab. Then make sure the following settings are set:
- Timezone – Your local timezone
Step 3 – PSTN Line
From the menu ensure you have selected “Voice” and click the “PSTN Line” tab. Then make sure the following settings are set:
Proxy and Registration
- Proxy – Your SIP domain, this can be found in the portal or on your account notification
- Register Expires – 180
- Use DNS SRV – yes

Subscriber Information
- Display Name – PSTN
- User ID – The extension number you will use for the PSTN account e.g. 1001
- Password – The extension password

Audio Configuration
- Preferred Codec – G729a
Dial Plans
- Dial Plan 8 – S0<:PHONE_NUMBER> for example if your main number was 03912341234 you would enter S0<:613912341234>
PSTN-To-VoIP Gateway Setup
- PSTN Ring Thru Line 1 – no
- PSTN CID For VoIP CID – yes
- PSTN Caller Default DP – 8

FXO Timer Values (sec)
- PSTN Answer Delay – 2

International Control
- FXO Port Impedance – 120+820||110nf
- SPA To PSTN Gain – 5
- PSTN To SPA Gain – 5
NB: If you find the volume to loud then try decreasing the gain settings, likewise if it’s to soft then try increasing the gain settings.

Step 4 – Save Changes
Now that all the settings have been made click “Submit All Changes”. Once the settings have been changed you should be able to call your PSTN number and it should divert to your HostedPBX and be routed as per any other external call.
Allowing Remote Management
If your device is connected behind your router and/or firewall and you want to be able to administer it locally you will need to enable the “Remote Management” option.
Please note, it is extremely important that your device is not accesible on the internet with this option enabled. If your device is externally accessible it could leave your device open to be exploited by a remote attacker. If you are unsure, please leave this disabled and contact your IT support personnel.
If you wish to enable this option, please do the following:
- Click the “Router” link
- Next click “WAN Setup”
- Set “Enable WAN Web Server” to yes
- Once you have enter a password click “Submit All Changes” to apply
- Once the changes have been applied you will no longer need to make changes via the ethernet port.
Factory Reset
If for any reason you need to factory reset your SPA3102 device you can follow these steps.
Plug a phone into the Phone port
- On the keypad of your touch phone dial ****
- When you hear the Linksys anouncement dial 73738 then #
- Now press 1 to confirm the factory reset and your device will be reset to the factory state.


