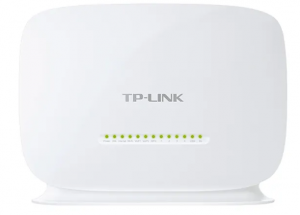
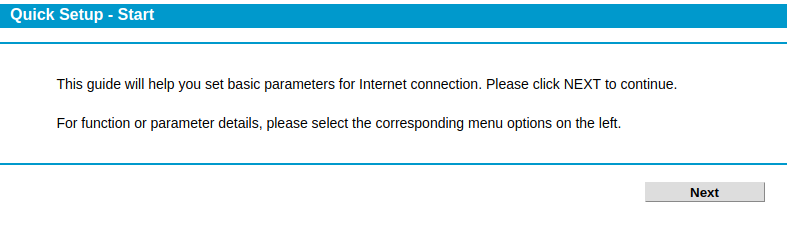
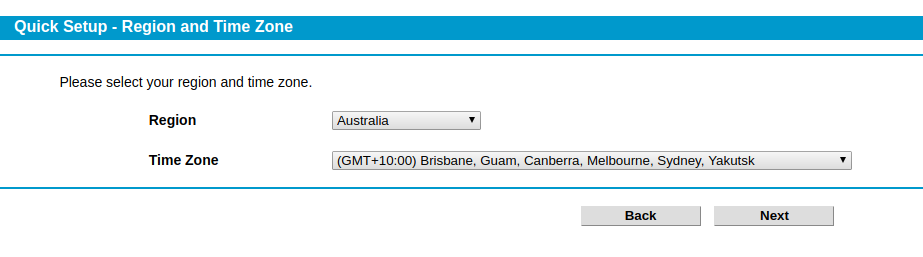
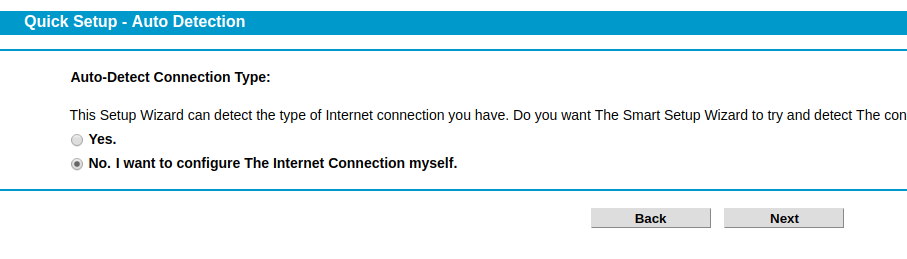
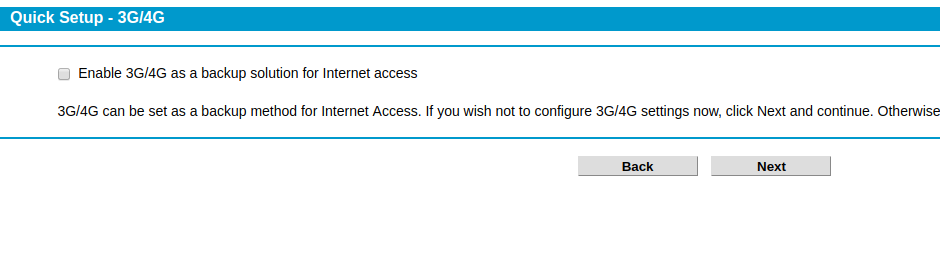
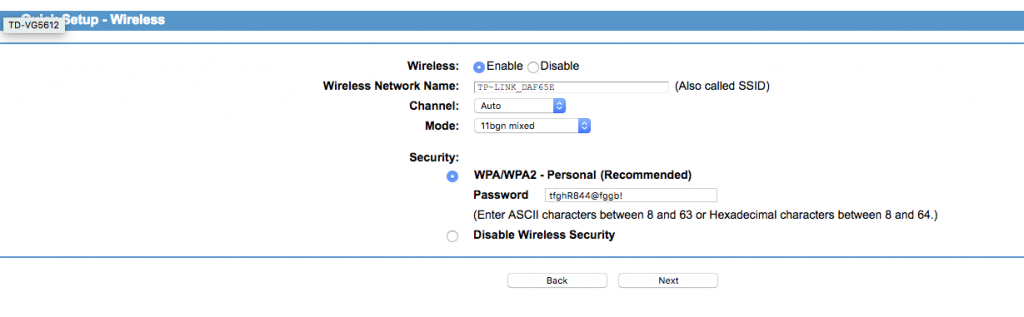
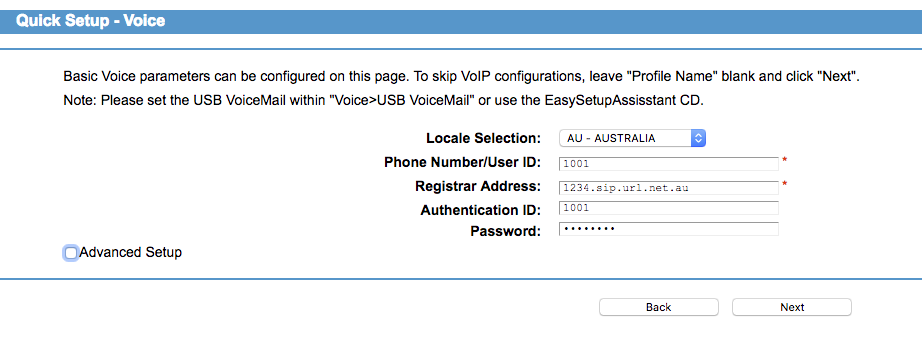
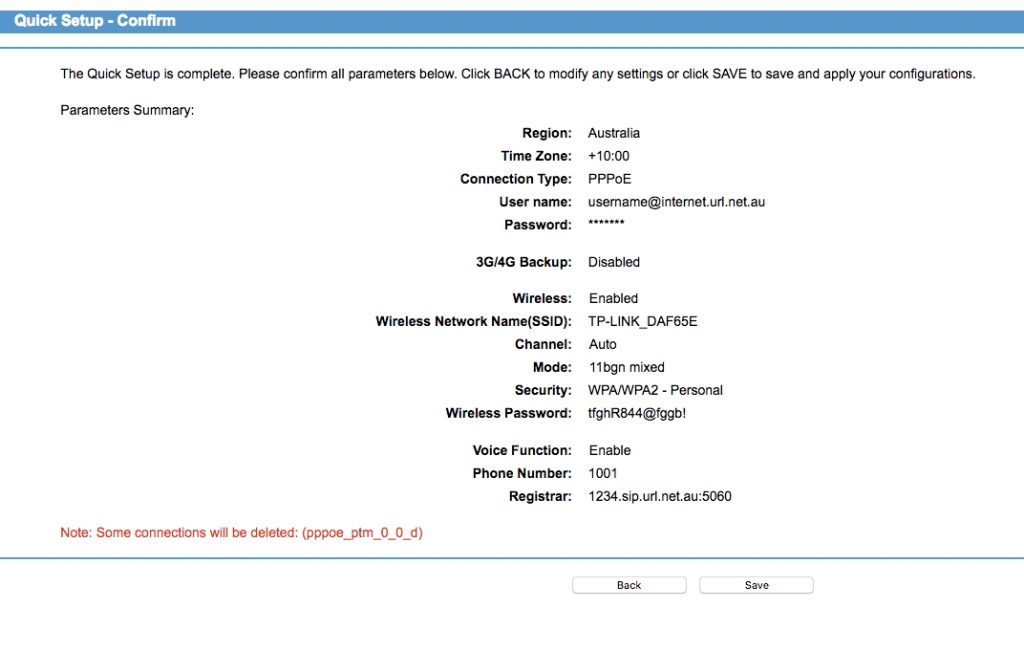
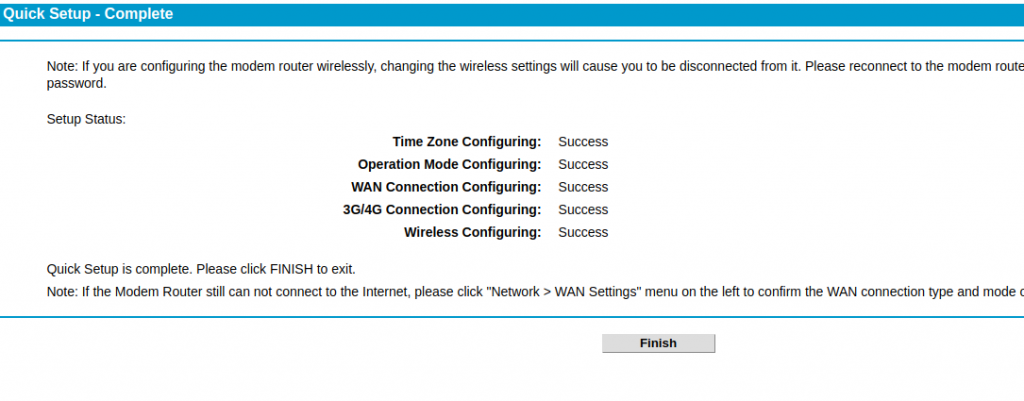
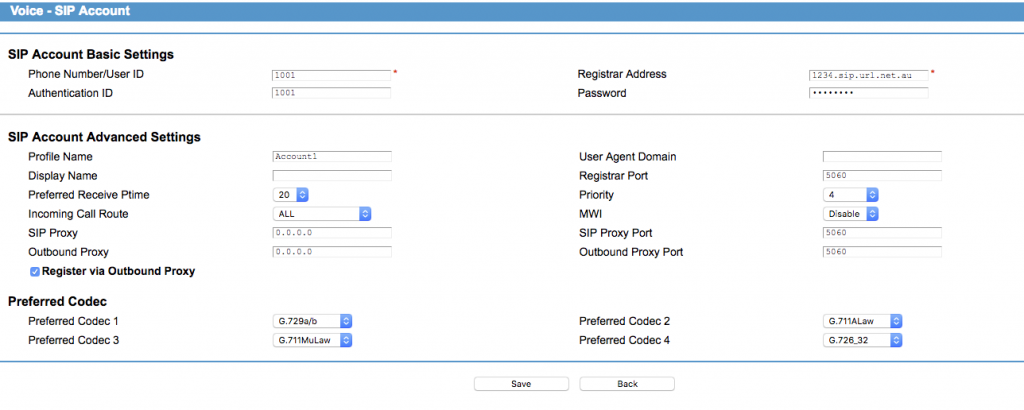
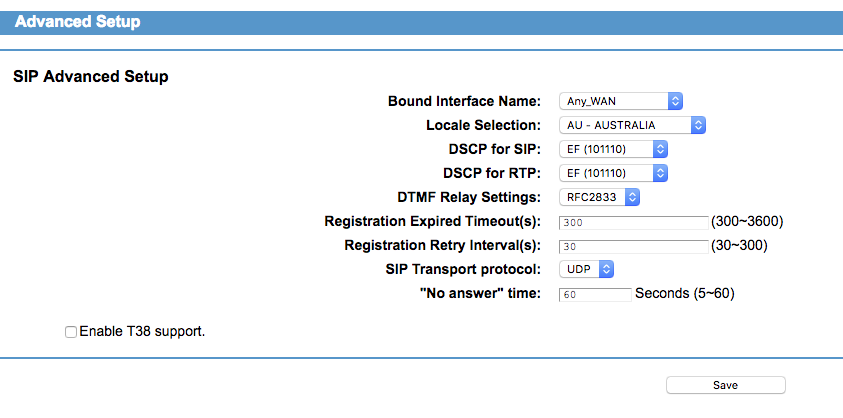
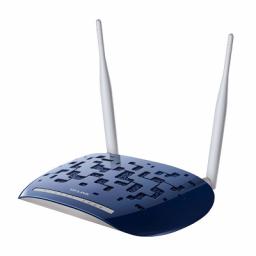
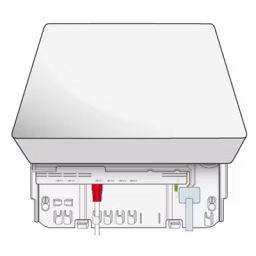
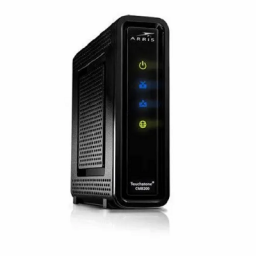
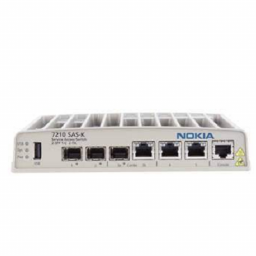
5 By Liam Hardware Guides Help Articles Internet Services nbn Internet Support 29 June 2023 Configure the TP-Link VG5612 in PPPoE Mode for NBN Configure the TP-Link VG5612 in PPPoE Mode for NBN Internet Settings Connect to LAN 1Browse to 192.168.1.1Enter admin for the username and passwordClick the Quick Setup linkClick Next Click Next Select No. I want to configure The Internet Connection myself. Then click Next Set ISP to OtherL2 Interface Type to VDSLEnable VLAN ID – uncheckedConnection Type to PPPoEClick Next Set the username to be your broadband username, normally it is username@internet.url.net.auSet the password to be your broadband passwordClick Next Click Next leaving Enable 3G/4G unchecked Set Wireless – EnabledWireless network name – Leave default or change to your own nameChannel – AutoMode – 11bgn mixedSecurty WPA/WPA2Password – Your Wireless password, it is recommended you make it random don’t use Password or 12345678Click Next Additional Voice Settings Configure Voice, if you do not have a voice service click nextLocale Selection – AustraliaPhone Number/User ID – enter the user name provided, normally 1001Registrar Address – Your SIP DomainAuthentication ID – enter the user name provided, normally 1001Password – enter your phone password Click Save to apply the changes If successful you should see success, click Finish. You should now connect your PPPoE router to Lan 1, Lan 2 or Lan 3 If you configured voice settings in step 12, please make sure you also complete the following.Click Voice from the menuClick SIP Account from the MenuClick EditClick AdvancedSet Preferred Codec 1 to be G729Set Preferred Codec 2 to be G.711ALawSet Preferred Codec 3 to be G.711ULawClick Save Click Advanced SetupChange Registration Expired Timeout(s) to 300Change No answer time to 60Click Save NBNTP-LinkVG5612 Liam / About Author More posts by Liam Related Posts TP-Link Archer WiFi router flaw exploited by Mirai malware TP-Link Archer WiFi router flaw exploited by Mirai malware There is a known vulnerability in the TP-Link Archer A21 (AX1800)… 1 30 Aug 2023 Configure TP-Link W9960 for Bridge Mode NBN Configure TP-Link W9960 for Bridge Mode NBN If using a PPPoE router such as a Mikrotik you will need to… 0 26 Jul 2023 NBN Fibre to the Premises (FTTP) Troubleshooting NBN Fibre to the Premises (FTTP) Troubleshooting If you are having trouble with your nbn fibre-to-the-premises service please try the… 7 16 Jul 2023 Configure the TP-Link Archer VR400 in PPPoE Mode for NBN Configure the TP-Link Archer VR400 in PPPoE Mode for NBN This configuration is used for NBN Fire-To-The-Node service, where the… 4 11 Jul 2023 NBN Hybrid Fibre Coaxial (HFC) Troubleshooting NBN Hybrid Fibre Coaxial (HFC) Troubleshooting What do the lights on the nbn™ connection box mean? Power – AC power … 4 14 Jul 2023 NBN Enterprise Ethernet Pre-Requisites NBN Enterprise Ethernet Pre-Requisites If you are deciding to connect to NBN Enterprise ethernet you will need to make sure… 5 07 Mar 2024 Reset NBN FTTC Device Reset NBN FTTC Device On occasion you may find your NBN FTTC service not performing correctly, sometimes factory resetting the… 10 23 Jun 2023 NBN Fibre to the Curb (FTTC) Troubleshooting NBN Fibre to the Curb (FTTC) Troubleshooting What do the lights on the nbn™ connection box mean? Power Check Check… 7 15 Jul 2023 TP-Link VG5612 – Change the PPPoE Authentication TP-Link VG5612 – Change the PPPoE Authentication Browse to 192.168.1.1 Enter admin for the username and password Select Network, then WAN Settings from the menu on… 0 28 Jun 2023 Configure the TP-Link VG5612 in Bridge Mode for FTTN NBN Configure the TP-Link VG5612 in Bridge Mode for NBN If using a PPPoE router such as a Mikrotik you will… 0 28 Jun 2023 Connect Fixed Wireless (FW) NBN to Mikrotik Router Connect Fixed Wireless (FW) NBN to Mikrotik Router These instructions will guide you on how to connect your Mikrotik router… 3 27 Jun 2023 Important nbn Information Table of Contents Add a header to begin generating the table of contents nbn® Fixed Wireless Fair Use Policy Enforcement… 6 31 Oct 2023 NBN HFC Boot Loop Issue HFC – NBNco Arris CM8200 – Boot Loop If you have a HFC connection you will have an Arris CM8200… 4 27 Jun 2023 Troubleshooting nbn Enterprise Ethernet Example wall mounted Nokia B-NTD with the cover removed. Example wall-mounted B-NTD with the cover in place. Please follow the… 7 05 Jun 2024 TP-Link Telephony Setup TP-Link Telephony Setup Note: Device Must Be in Router Mode not Bridge. Log in to the router using the credentials. Go… 1 29 Jun 2023